Tuesday, December 25, 2012

Lower Sleeves

Yes, Christmas day finds me sewing and soaking vintage linen in borax in the bathtub to remove weird stains... my dad, mommy-in-law, and hubby all have to work today, so both family Christmas get togethers are later this week and today I am home alone with baby-to-be (almost 15 weeks along!!!) and the critters. 

I've been slowly slaving away at the lower sleeves for the Bartolomeo gown between a sudden onslaught of terrible headaches (and, I'm pretty sure, my first migraine ever).   I don't think I did them very period accurately, and they are definitely not up to my usual standard of work, but I don't think they turned out too badly. 


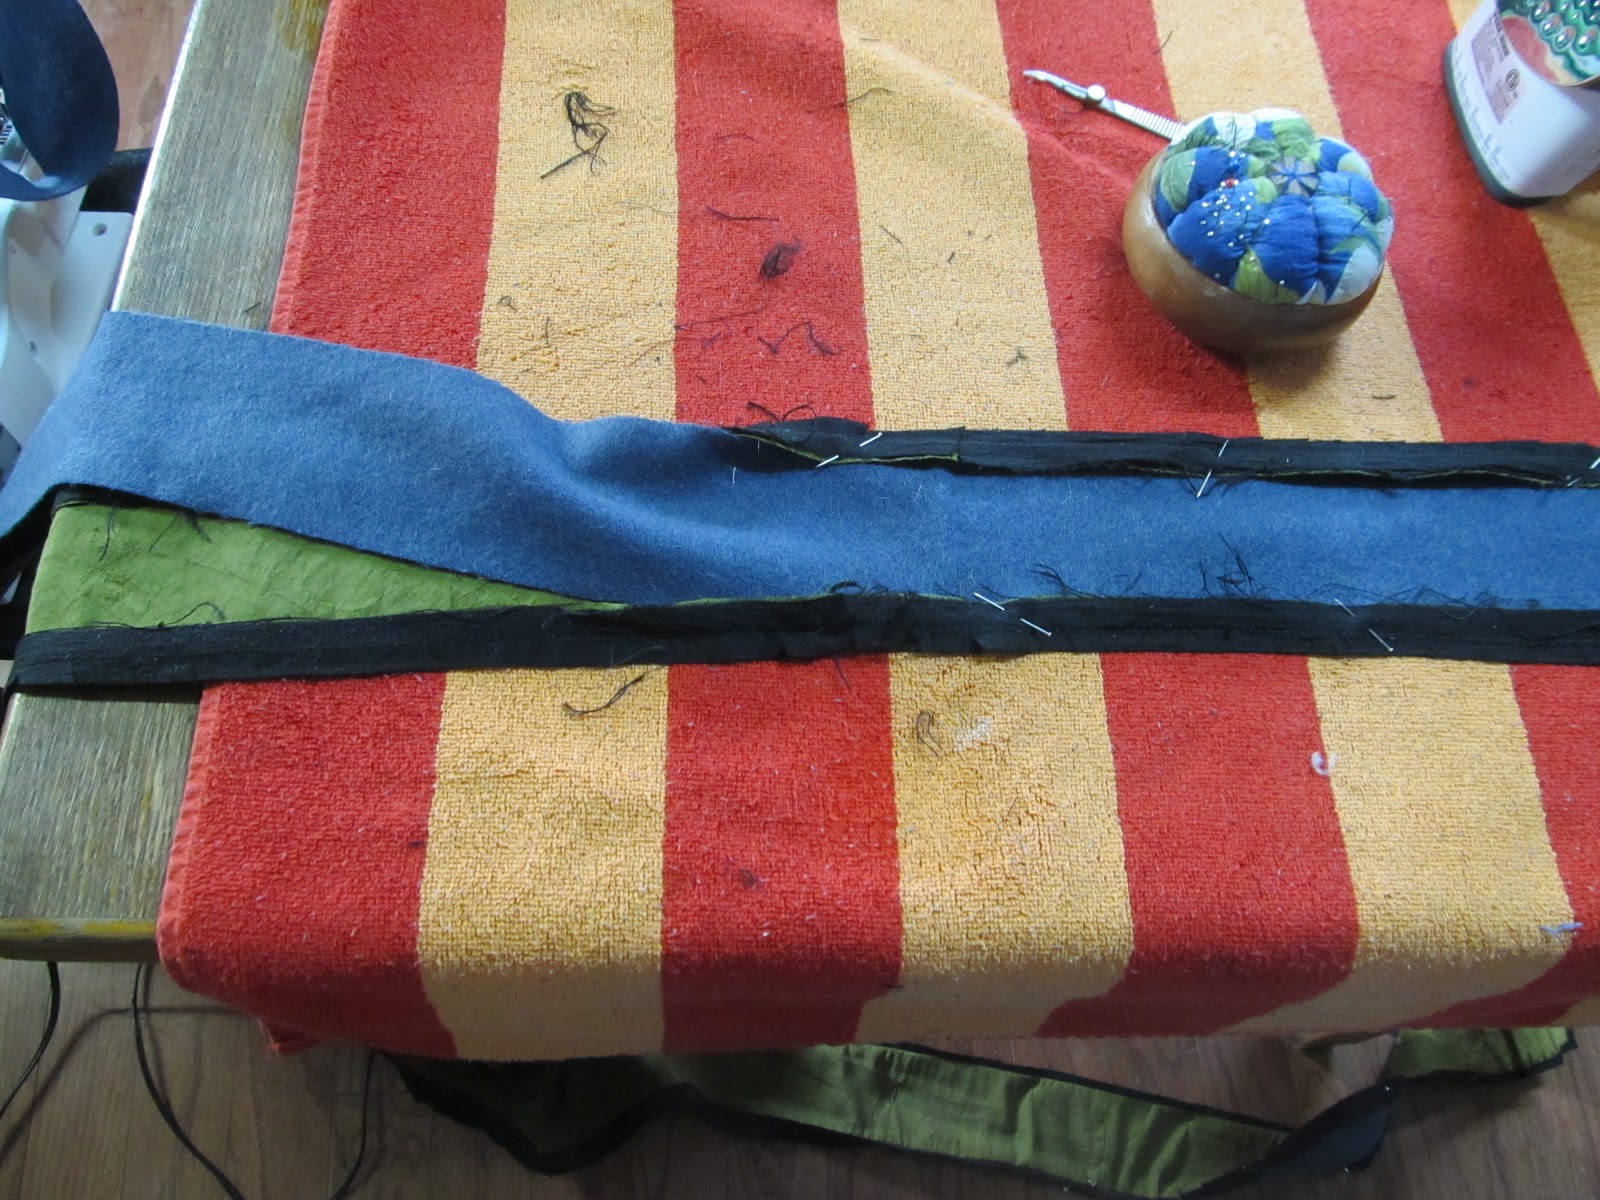
I used the same lower sleeve pattern as for the Bacchiacca gown, but narrowed it down a wee bit since I didn't have to accommodate the extra volume of the fur. I puzzled over the layout for the slashes for a while, and came up with this; (the vertical black lines divide the sleeve roughly in quarters)


Because I normally cannot stand raw edges being at all visible, all the slashes are faced with an oval of black linen, and topstitched flat by hand, with a bit of whipstitching at the corners for security. 


I was then going to line it...somehow...but gave up on that hair-brained idea rather quickly. This leaves all the ovals unfinished....but hopefully I will get over that, they are on the inside and for the most part they seem inclined to stay flat and not 'curl' back through the slits. 

I then sewed the seams by hand with a very narrow french seam and finished off the bottom with more of the black piping and a strip of bias on the inside to cover up the edges. In the portrait it looks like, if anything, the cuffs were finished with tabs of the same olive silk. I thought using the black would tie the sleeves into the gown better, and I already had extra strips cut leftover from the skirt. 


Next and last is the baragoni! That is this afternoon's project. And then on to accessories. The vintage linen I mentioned above is what I have found for the partlet. It's a light yellow, with a bit of 'tea-dyed' colour to it. I am happy I found it though (Ebay) because the only other linens I could find online were BRIGHT yellow, and I cannot do bright yellow. It is my least favorite colour (except in rare fanatical short lived moments of extreme infatuation), but it does help 'make' the portrait, so yeller 'tis. The grapes I will embroider in dark purple floss, either silk or cotton, depending what I have more of in my stash right now. 

I also have some lavenderish-blueish silk dupioni to make the sash. And if I am really motivated, I still have leather set aside for gloves (which always seems to be my some-day project). And Hastings has offered to help with the balzo, which has me incredibly excited! I also hope to scrounge up some cool black beads for the necklace and make a new camicia, a scandalously sheer and flowy one:-) Since the neckline of the camicia is not visible in the portrait I have creative leeway there, but whatever I make needs to 'puff' through the small sleeve slits fairly easily, so no stiff linen for this camicia. I'm trying to decide between chiffon or cotton voile. 

Sunday, December 16, 2012

Bartolomeo Skirt Progress

I've have gotten the skirt attached and mostly finished.

The main part of the skirt is made from one large rectangular piece, with a french seam down the center back. The full circumference is just a little less than 4 yards, all I could spare from the limited fabric I started with.

I did several things different with this skirt than with previous skirts. This skirt is not lined, in the interest of keeping the whole thing lightweight. And instead of padding the top of the skirt where it is pleated, I sewed in a double folded piece of starched silk organza, which still adds structure, but no more bulk or weight.


In the portrait it can be plainly seen where the padding is either sewn or ends, at the waist. Even though I sewed the organza down to the green silk at its bottom it is not all that visible from the outside. I am hoping that it will kinda 'puff' up once its been washed once or twice and be more visible. There is also a very visible diagonal seam on the right side of the portrait, which I assume it there due to the original  skirt having to be pieced. One thing I have not played much with is with period skirt patterns, usually due to starting off with minimum fabric and being scared of what might be wasted in the cutting and piecing.

I went with more a box type pleat than a cartridge pleat on this one, as I felt it more accurately represented the pleats in the portrait and would work better with the unpadded silk.


I then moved on to the hem and guard. Although the skirt hem is not visible in the portrait I decided I should do something in keeping with the simple slashed piping on the bodice. I started by first hemming the skirt, and inserting a three inch wide piece of wool.


I then made the guard using a four inch wide piece of silk, which was all that was left from trimming the skirt before hemming.  I cut many strips of the black silk and much clipping ensued. Since I was using short pieces cut from scraps there were going to be many joins in the black silk. Instead of stitching the joins, I cut the ends of the pieces at the same angle I was cutting the snips and butted them up together on the green silk. After assembly is completed the joins just blend in with the rest of the snips. They are sewn onto the green silk with a half inch seam allowance and then the seams are folded back and pressed.


I then inserted another strip of wool, pinned it in place and then hand sewed it to the skirt.


I felt that it still needed something, but I reminded myself to stay calm and choose something quick and simple. I decided on a simple circular pattern kind of like the one on the hem of the orange dress in Susanna and the Elders (1517). Although the design in the picture is likely embroidered I decided to go subtler and 'quilted' the design on the guard through all the layers. I've gone all the way around once, leaving three inch gaps between the three inch diameter circles, and still need to go back and fill in the rest.


I'm really liking how it looks so far, and pleased that its one of those details that can really only be seen close up.

I also made the period tuck in the skirt, just a bit above the guard, as seen in the extant Eleanora and Pisa gowns and paintings of the time. I've done this before on petticoats, usually because I accidentally made them too long to begin with. This is the first time I have purposely remembered to include it in the gown.


Ands that's it for now. Been lazy and unproductive today, but will hopefully get some more circles sewn in before calling it a night.

Thursday, December 13, 2012

Here goes....

It took very little time and convincing to help me decide to dive in....and maybe this will be the perfect project to get me inspired and motivated to sew again.  


This is the fabric; 100% silk, almost slubless dupioni. The picture turned out way lighter than it is in reality, thanks to the fluorescent garage lights we have that have yet to be replaced. The true color is exactly like the light portions of fabric seen in the portrait (according to my computer screen anyway), however, it does not go nearly enough towards the dark/black side in shadow. I'm guessing the original silk was probably cross threaded black and olive, where this is wove with the same color going both ways. Alas, its likely as close as I can get and not bad for a $5 per yard find. 

I started with the bodice, using the pattern for the Carpi gown I made earlier this year and altering it slightly. I shaved off about an inch off the neckline side of the shoulder straps, as there is no wide band of trim around this neckline to be accounted for. I'm hoping to get the shoulder straps to recede and 'disappear' properly into the baragoni. I also took almost two inches off the top front of the bodice to account for the daringly low neckline. Its still not as low as in the portrait, but as close as I feel I can comfortably wear. I also shaved a bit off the bottom of the bodice and brought in the center front and center back. 

The bodice consists of 4-5 layers. In the front; 1) olive silk outer 2) cotton interlining 3) wool for padding 4) another layer of wool 5) black silk/cotton lining. The back and straps consists of the same, minus one layer of wool.  This is in keeping with most theories about bodices of the mid-early 1500's being padded with wool, felt or something like cardboard, and not being boned.  The wool layers are 'quilted' to the cotton interlining and then sewn in between the lining and outer. I trimmed approximately half an inch of the wool away around the edges to precent so much bulk in the seams when it comes to turning. 


In the portrait there does appear to be a narrow trim of black around the neckline, and the two most prominant options for what it could be, according to other portraits of the time, is either a narrow black guard, or a slashed 'piping'.  ( http://katerina.purplefiles.net/DOCO/Florence%20styles.html has a good sampling of this ) As I haven't taken the time to find a high res version of the portrait for proof as to what it could be, I decided to go with the piping, as it's something I have not played with much. 


My biggest previous attempt was on the front edge and collar of the zimmara for IRCC I, and I believe I made the initial strips for the piping too wide, and the end result was 'floppy'. 


So I tried to make the strips for this piping narrower to begin with, about an inch and a half. I used scraps of very poor, terribly slubby black dupioni ( on clearance at Hancock fabrics, cheap enough that I couldn't pass it up, even in its awfulness). I'm hoping it will hold up OK, and not fall apart, but it was what I had on hand to use, and I am too eager to order something and wait for it to arrive before proceeding. I pressed the strips in half, and snipped about a quarter inch into the folded edge at a slight angle, using my thumb for spacing.  I then sewed the piping to the outer and lining layers of the bodice with a normal seam allowance, raw edges together, and turned this inside and topstitched it flat by hand. The lining I then folded under and whipstitched into place. 


For the most part I think I am happy with how it turned out. There are a few spots, in the corners mostly, that may take some tidying up. 

The bodice has side back lacings. I hand bound the eyelets, five on each front side and six on each back side. They are spaced to allow for spiral lacing, as seen on the Eleanora burial gown and in various portraits of the time. The blue ribbon will eventually be replaced by lucet cord to match the gown. 


So far I am very pleased with how the neckline sits, low and wide, without falling off. So far, there are three things I have found that help the most with keeping the straps in place. Firstly, ensuring the shoulder straps (all layers) are cut on a bias to allow for them to 'hug' the shoulders. I also have played with this pattern enough that (unintentionally, over time) my shoulder straps have developed a bit of a an outward 'flare' at the base of the front strap, armscye side, where the strap meets the front of the bodice. This allows for the arm to still move comfortably, without the strap either falling or being restricting. The third thing is to keep the back of the gown high, keeping the base of the back of the straps high and unable to slip. Now when it comes to styles that are low and wide with an obviously low back, I am at a loss. But this is what works for me, and I find it very comfortable. 


Now I am off to decide how much of the remaining fabric to allot for sleeves and how much will be left for a skirt. I started off with meagre 6 yards of 45 wide fabric. I used maybe one third a yard for the bodice, and will need at least a yard per sleeve, not leaving too much for a skirt, so I'll see what I can weasel out.

Tuesday, December 11, 2012

I should not be thinking about this.....

.....but I have the fabric, beautiful olive green silk.

Veneto Bartolomeo? 'Portrait of a Lady in a Green Dress'


And it would by really nice to have a more pregnancy friendly court gown, with a higher waste like this, that could still be worn after. My IRCC II gown, although wonderfully warm, is really heavy and made for a very uncomfortable afternoon for my back and shoulders.

...and this would go together quickly as there isn't very much in the way of hand-workable details....on the other hand I don't know If I can go so plain...

I'm also really liking this portrait by Bambino;


And it has roughly the same color scheme of green and gold with room for black to be thrown in (heraldic colors).  The only problem, with either one, is the balzo and my ineptness at that sort of creation.....

 I don't know, like I said, I shouldn't even be thinking like this with so much other stuff needing done...but I have the fabric and the idea has entered my brain and it may just not let go.....

Riding Doublet Update

I have been making slow progress on Nicolla's doublet. Everything is assembled and finished except for buttons and button loops.

The doublet fit perfect, and I didn't have to adjust anything. The first thing I did after the fitting was lay the two halves out flat again and finish sewing on the guards. They are made out of bias cut black velveteen and positioned to make the bust look bigger and waist look smaller. The stitching that holds them in place also 'quilts' the layers of the doublet together. 


Then I removed most of the basting stitches and hand sewed the side and back seams, sewing through the outer layer and padding together and then flattening the seam and whipstitching it down. 


And then the lining is neatly folded in and whipstitched down.


The collar, waist tabs and shoulder wings are all padded as well, and the exposed edges bound in strips of black velveteen. 


Alas, that's about all I have accomplished in the sewing world the last few months,  between puking and day-long naps. The beginning of my second trimester is just days away and already I'm starting to feel so much better....and I'm so behind. Christmas shopping is about done, plans for baking are looming (as soon as I can stomach the thought of butter) and then several long, cold, plan-free months in January, February and March where I can hopefully tackle my overflowing pile of UFO's (UnFinished Objects:-))