Monday, January 30, 2012

'Over and Above' Idea

I've been needing to make myself a heavier zimarra or cloak for quite some time now. About the only SCA event I've been able to consistently attend for the last few years has been Uprising, and its usually bitter cold and wet, and so I'm quite happy for this excuse to make something warm. I basically have two options.

1. I recently made a waist length wool cape for a close friend and love how it turned out. I have enough of a dark green wool coating in my stash for the outer layer, but nothing suitable for a lining. I'd either have to invest in some velvet or flannel or something, which my budget right now does not really allow. I'd probably to a fairly simple guard along the edges for trim. Without looking, I'm thinking I remember several examples of this style in 'Moda a Firenze'.

2. My other option, which I think is more likely right now, is a flannel-lined wool Zimarra. I have some heavy black wool coating and some bright pink cotton flannel in my stash right now that I think would look striking together. I found this portrait on Bella's site with those colors, and the same basic shape I would want to go for.
Gian Paolo Lolmo, c1580: Portrait of a Woman Aged 19 Years
 
I would probably make the sleeves closed instead of open up the front for added warmth. And since my wool is plain and not patterned I'll have to do some other type of trim. I'd love to do surface embroidery over the whole thing, but don't think I could accomplish that in a month. I've been browsing Ebay and searching for some sort of appropriate trim, but have been having difficulty.  I'm thinking I'll probably end up doing something like the embroidered trim in this portrait of Countess Livia by Paolo Caliari;


Cotton flannel is what I will use since I have it, and it will be warm:-) But something I need to research is the use of flannel in period. I'm pretty positive about the existence of wool flannel, but I have my doubts about the existence of cotton flannel. I don't know where wool flannel would have all been used....Does anyone have any insight on period flannel????

Gown Finis!

The Carpi dress is momentarily finished and I am very happy with how it turned out. No accessories yet, but I have plans.....I found a really good deal on some sheer silk on Ebay, so I do in fact have material to work on the partlet, just not the time in the next few weeks (we are in the middle of remodeling a garage into a studio apartment, while living in it, makes sewing time difficult to find). Oh, and then there's the IRCC mini-challenge coming up in two days, so....yeah it might be a while before I get around to the partlet.

Anyway, pictures.... I did have the gown steamed and wrinkled free.....but that was several days before we got around to taking pictures, plus I look like I haven't slept in several nights, but here they are regardless;

Above is the roll of guard. Instead of inserting a strip of wool inside the bottom of the skirt, I decided to go with a finished decorative band that would be sewed onto the outside of the skirt, akin to the solid coloured guards on early 1500 Florentine gowns. It consists of a strip of wool, covered in linen, and five rows of the silk ribbon, sewn down on each side by hand. The skirt is hemmed by folding both the lining and the linen inside to make about a half inch finished hem, and the guard is sewn down so the lower edge covered the stitching of the hem.

What I used;
6 yards 60 inch wide green handkerchief linen
aprox. 1 yard 60 inch wide brown wool
4 yards 45 inch wide tea-dyed muslin
1/2 yard heavy blue linen
aprox. 45 yards copper silk ribbon
leftover floss for eyelets

So things I have still to do;
1. partlet, same copper ribbon will be sewn onto silk organza
2. caul or cap, need to do more research, will use scraps of linen or muslin
3. two necklaces, need to do more research on jewelry making, purchase beads
4. gloves, will use purchased pattern, and thin leather from stash
5. netted/sheer cap worn over caul, need to do more reasearch, or beaded headband
6. linen camicia with whitework on neckline and cuffs (loosely based of men's shirt in Patterns of Fashion)
7. earrings, possibly
8. fan, I'll probably make another flag fan, instead of the feather fan in the portrait
9. take final GOOD pictures, with everything wrinkle free and me not looking so tired


Friday, January 20, 2012

A bit about the sleeves

When I made my 'bella' gown several years back, I stiffened the baragoni with -eek!- modern interfacing. It did work really well, especially with the synthetic fabric I sewed the dress with. Just for fun here's a picture of that....

All in all I love that dress, and I've even thought about making a new one like it, knowing what I know now. I sewed that dress with cheap fabrics and completed it in about three weeks, applique and everything. If I were to re-do it I would make it a long term project and embroider it instead of machine appliqueing the gold bits.

Anyway, back to the point. I couldn't use interfacing this time, seeing as it is not period. My theory (again unresearched) is that since we know skirt pleats were padded with wool, and the hems stiffened with wool, why not pad the pleats on the baragoni with wool?  If I'd have really been thinking I would have just interlined the outer fabric with a layer of wool, but instead I took a strip of wool doubled and gathered that into the seam at the bottom of the baragoni, and about a one inch wide strip at the top of the baragoni and smocked that to fit to the lining. The doubled wool gives a sharper 'fold' where the baragoni reaches its fullest puff and I think it did turn out well, but like I said, if I was thinking I would have just interlined the whole thing with a solid layer of wool. 


The sleeves are bag lined. The seam where the baragoni and lower sleeve meet is basted to the lining to keep the puff from sliding down.  The top of the sleeves are then whipstitched to the shoulder of the gown across a little more than half the sleeve opening.


 And here is a picture of the wrist tabs, which I am very happy with.


I've got the hook and eyes sewn on the skirt openings and the method works wonderfully. I've also finished the guard and sewing it to the bottom of the skirt, but I'll post more about that later. Just a few places on it I need to finish up a bit neater, and hopefully sometime this weekend I will get pictures of the whole thing. I won't be able to finish the camica for it, and will have to wait on the partlet and other accesories for now, waiting on spending money, but hopefully I can throw enough together from my stash and current wardrobe that I can wear the whole thing properly. I need to do a good go-through of my current wardrobe and clean out much of my earlier things I've made, many things of which are done with synthetic fabric or don't fit well, and then re-plan my wardrobe to better match my persona and reflect the fact that I hardly ever even go to events where I need court gowns.... sadly.


Friday, January 13, 2012

Skirt Attatched!

So I broke down and used the machine...shame on me.... but I only used it for two seams, so not too bad, right? I got a bit of ambition last night and just HAD to get the skirt on the dress. I tried a new variation of a technique previously used; first I sewed the muslin lining, the linen, and a three inch wide strip of wool all along the top edge with about a half inch seam. I then trimmed the perpendicular edges and sewed that up to be the back seam. Then I flipped the linen/wool to the outside, so that the top edge was finished and six layers thick. This was then pleated to a narrow strip of linen which I then whipstitched to the inside of the bodice. I went back to the outside and stitched the tops/outside of each pleat to the very bottom of the outside layer of linen on the bodice using invisible stitches. This aligned everything beautifully, and I loved how it turned out. 

I had any doubts about how this gown would turn out with using linen instead of silk, they are gone. The sheen and lightweightness of this gown so far are perfect, plus washable!!

Back to the skirt; instead of having side back slits to co-ordinate with the side back openings, I instead left about a nine inch portion of the skirt unpleated. Once the gown is finsihed, the excess skirt will close with hook and eye. I haven't tried this before, but saw it somewhere ( bad me, saw it somewhere and didn't document, bad!). It leaves a pretty substantial break in the even row of pleats BUT this will get rid of the gap in the skirt that shows camicia beneath (one of my pet peeves).


 Ive also been slowly working away on the sleeves. The first one is completely finished and the second one is ready to be assembled. Once i'm finished with both I will post more on the construction experiments I performed upon them.

On another note, I have been convinced by family and friends to pursue sewing as a business. I stay with my husband's granny during the week, making sure she eats, and all that fun stuff, which gives me oodles of time to sew instead of sitting and watching the Walton's with her all day. I'm slowly starting to work on a website where I can put things up for sale and take commissions. This will be an interesting pursuit, but I'm anxious to make a bit more cash and spend my time being productive and useful. Any thoughts or ideas for what I could encorporate? Or if i'm even skilled enough to do this?

Saturday, December 24, 2011

Wrinkled... but I took pictures anyway.

Here's the pictures of the bodice with trim. There are four rows that come up in the square, and then three that run paralell to that and up and over the shoulder and down to the center bottom of the back. I spaced everything about 3/8 in apart except where the shoulder straps widen and I spread the trim to kinda cover more area. I think it looks better that way. I couldn't decide whether or not to also sew the ribbon across the back of the neckline and then kinda forgot about it in the excitement of getting the rest of it all sewn on the bodice. I might add some later. If anything, I feel that I made the center trim too 'square' in the front and didn't taper it enough to the middle.


I've worked on the sleeves too. The first thing I did was the wrist tabs. I don't want to put a button or opening at the wrists cause I am too lazy to try and find two buttons that might match the dress, so I took my wrist measurement and rounded it up to 8 inches - which still fits over my fist so I can still easily slip it on. I had determined that I would make all the tabs one inch wide, and then the vertical trim on the lower sleeves would be spaced one inch at the bottom and tapered evenly upwards to best give the appearance of the trim in the portrait. The tabs are made from 3 inch squares of the linen sewed into tubes with a half inch seam, turned inside out, pressed, trimmed along both edges and then folded in half. I basted eight together for each wrist. The finished string of tabs turned out to be a bit more then 8 inches (grr) but I think I should be able to ease them into the wrist opening without too much difficulty.

The rest of thw sleeves will be composed of three parts, the lower sleeve, the upper sleeve and the lining. To get the proportions for the upper part of the sleeve, I took what would have been the upper part of my regular sleeve pattern and roughly multiplied all its outside measurements by two. In the portrait it is difficult to determine if there are more rows of  trim on the upper sleeve than there are on the lower sleeve. In order to make it easy on myself I decided to make it the same number. As I mentioned before, on the lower sleeve, the trim starts off at the wrist being spaced one inch apart and tapered upward. I took the resulting spacing measurement at the top of the lower sleeve and also multiplied that by two to get the spacing measurement for the trim on the upper sleeve. Once I'm ready to gather the two parts together, matching up the trim should be pretty easy and result in a fairly even gather...I hope.

I have the trim sewn on to the first lower sleeve and about a quarter of the way done sewing it to the first baragoni. So far I've done it all by hand and haven't broke down and used the machine. I'd be pretty tickled if I don't get too impatient and could finish the entire thing by hand, but looking ahead to the skirt......that seems doubtful.

Wednesday, December 21, 2011

Carpi Bodice Done

I've been making pretty good progress on the dress, dispite working on a few quilts for Christmas presents. I have the bodice completely done, and since I've taken pictures last, have also got ALL the trim on the bodice as well as started on the sleeves. But for now here's just a few pictures of the untrimmed bodice and a little  about the construction methods I ended up using.

The bodice is interlined with one layer of medium to heavyweight linen/cotton fabric and one layer of brown wool which are basted together. The outer jade-coloured handkercheif linen is also used as a lining. The bodice is finished off in two separate peices, the front, and then the back with the shoulder straps. They are bag-lined, and then the lining is 'topstitched' through the layer of wool and heavy linen but not through the outer layer of linen. This gives really nice edges and smoothness on the outside.
I did a total of 18 hand-bound eyelets, spaced for spiral lacing, using an awl and cotton embroidery floss. Here I have it laced with silk ribbon but I plan to eventualy make some lucet braid to use.
After the front and back sections were finished I pinned the shoulderstraps to the front bodice portion and whipstitched the edges together from the back. I'm very happy with how this bodice turned out. It is very comfortable so far. I seem to have gotten the shoulder straps exactly where I wanted them (we'll see what happens when I add sleeves) and they are not tight or constricting ( which is usually me biggest problem) . The outside surface is very smooth and took the trim very well.


                            Hopefully tomorrow I will get pictures up of the bodice with trim:-)


Wednesday, December 14, 2011

Bodice Mockup

First of all, thankyou to my few followers for your comments. I've been wanting to converse with some of you but for some reason I cannot leave comments.....I don't know why, I just don't understand computers/internet all that well.

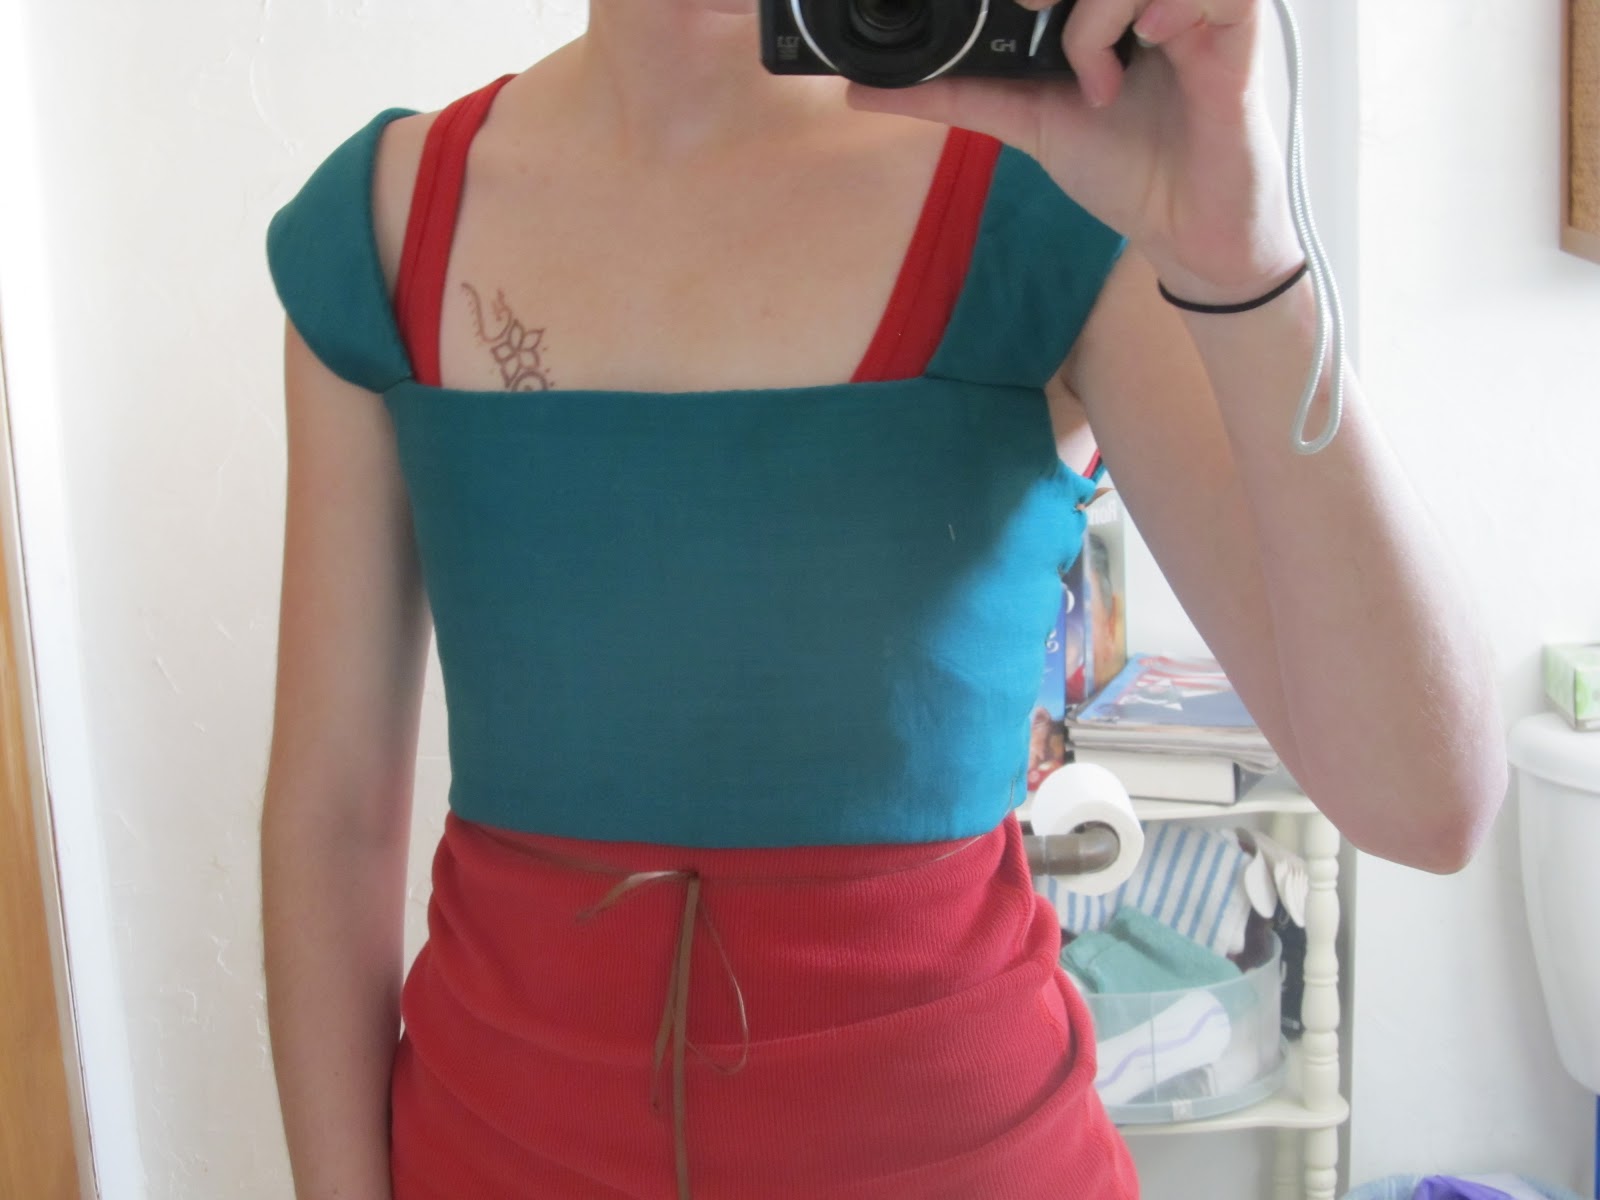
On the brighter side, I've been ambitious and today I made the mockup for the carpi gown. It was rather fun, having no help, and taking it off and on and off and on and trimming and pinning... I think I got it where I like it now. I let it sit for several hours and tried it on again to be sure, and then cut out the permanant pattern out of more white cotton, and hopefully I will get to cut out and begin constructing the bodice tomorrow.


As you can see there was alot of pinning and tweaking of the shoulder straps. They end up being kinda a funky shape once they're laid out flat, but they hug my shoulders fairly well without being too tight. My worries however, are wether or not they will continue to hold their shape once the sleeves are set in, and wether or not the fact that they are much narrower where they join the bodice front will make trim placement more difficult. Since the ribbon I am planning to use is so narrow I think I can ease it closer there without it looking too silly. I guess we will find out.  The diagonal wrinkles under the bust will theoretically dissapear once the bodice is constructed with the proper materials.

I'm still planning on interlining with a layer of linen and wool stitched together, but now am trying to decide if I wish to 'bag' line the bodice like I do with most of my gowns, or once again try the  'flat' lining method, or wrap the front fabric around the interlining, whipstitch it down and then line it by turning the edges of the lining in and whipstitching it on.....I've never had much luck with that method, but I think it is more period? I haven't done much research on that area.